


Gifts Under £20
These gift ideas are all great letterbox gifts and make great stocking fillers too.
Save precious pounds with multi-buy offers and save valuable time by adding a gift box!
Don’t forget to subscribe to my emails if you would like 15% off your first order too!
£12
£14
£16
£15
£15
£16
£12
£10.50
£12
£14
£15
£16
In need of last-minute gifts under £20?
Can’t decide what to buy your loved one?
If the answer to either of those questions is yes, then a gift voucher is the perfect solution!

Gifts Under £30
Looking for a gift that can be sent direct to the lucky gal?
Maybe you just don’t like gift wrapping?
I have lots of gift set options and I can even write the gift message for you.
Don’t forget to subscribe to my emails if you would like 15% off your first order too!

£30

£30

£26

£24

£26

£28 (2 Clips)

£28

£28

£30

£24

£26

£28 (2 Clips)
In need of last-minute gifts under £30?
Can’t decide what to buy your loved one?
If the answer to either of those questions is yes, then a gift voucher is the perfect solution!

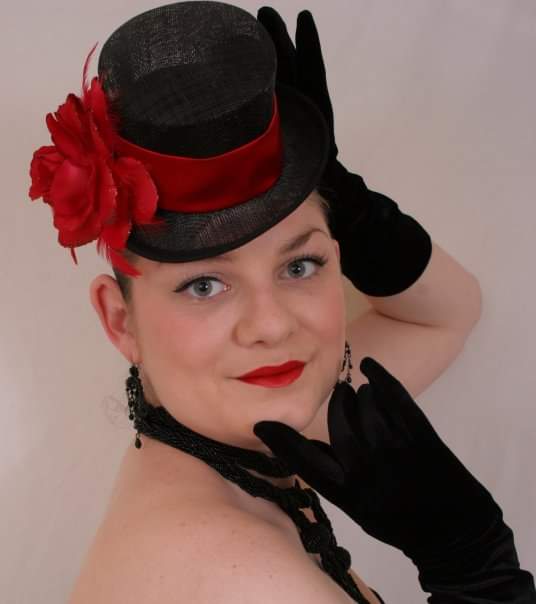
Today, we’re diving into one of my all-time favourite accessories: the beret. If you take a peek around my shop, it’s no secret that I love berets so much.
This iconic hat style has been around for centuries, traditionally worn by shepherds in the Basque region of France and Spain. Over time, it became a symbol of French fashion and is now recognised worldwide as both practical and stylish.
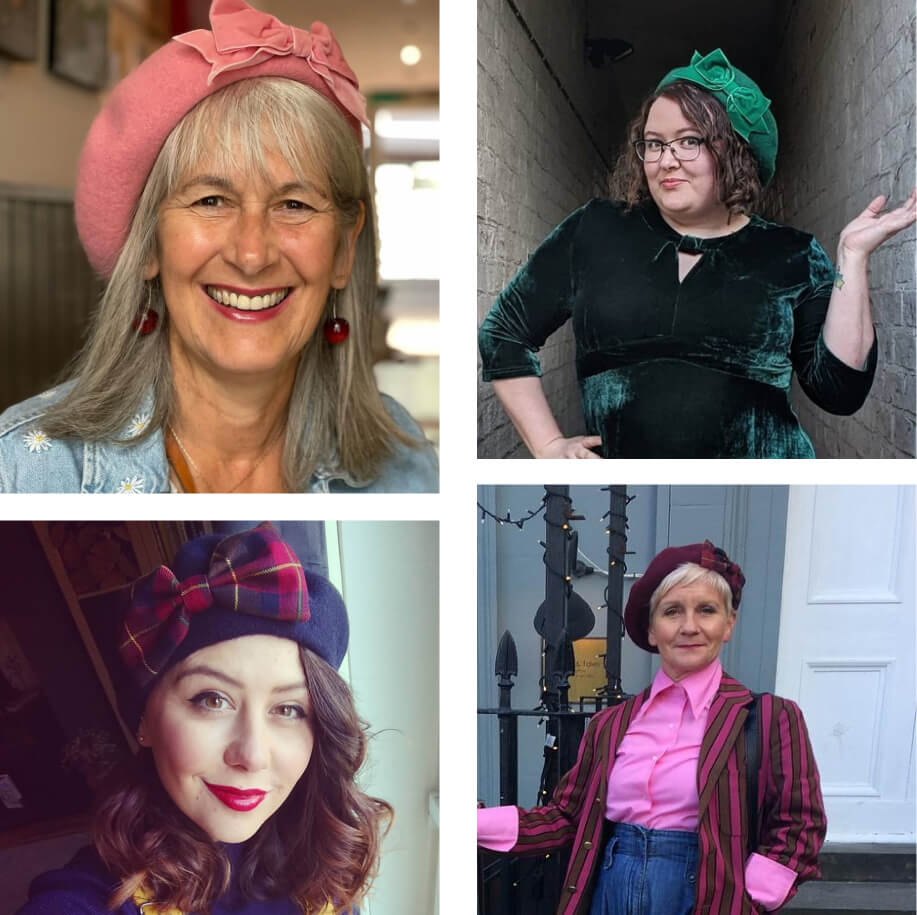
I’ve always adored berets, they are very versatile and have become a staple in my autumn and winter collections. They are the signature pieces of my shop, and many of the ones I create have bows or embroidery, the latest featuring pearls, studs, and ribbon rosettes.
I often hear people say, “I don’t know how to wear a beret,” or “I don’t look good in a beret.” If that thought has ever crossed your mind, this blog post is for you!
Anyone can rock a beret – so I will explain how to wear them, make them fit just right, and take good care of them–so let’s find out how to wear, style, and care for your beret.
When you first try on a beret, it might feel a bit snug. That’s completely normal!
Sometimes it takes a bit of wear to loosen it up, but here are some tricks to help you break it in:
You can take a look at a visual demonstration on my YouTube channel. Remember, most berets are one-size-fits-most, but there’s always a bit of wiggle room to customise the fit.
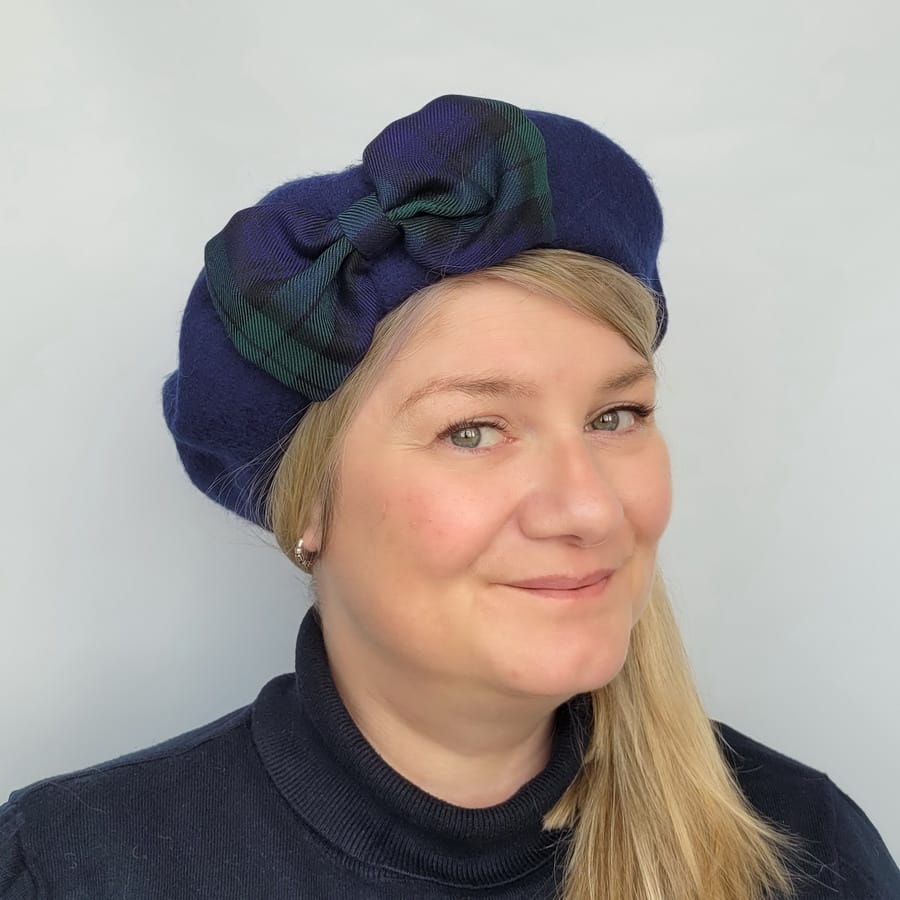
There’s no “right” way to wear a beret, but here are some styles to inspire you:

Behind the hairline: My personal go-to is wearing my beret just behind my quiff, letting it sit comfortably around my ears. This keeps me warm and looks effortlessly stylish.
This is a great option if you have a fringe – it will stop it getting “squished” and flatted onto your forehead.

Classic French chic: Want that 1940s French look? Tuck the beret lower on your forehead, with your fringe or the very tip of your hair peeking out. Pull the stalk for an extra bit of flair!

Angles for attitude: Berets are all about angles! Play around with where the bow or embellishment sits until you find a look that works best with your hairstyle and face shape. I personally love the bow on the right side because of the way the hair falls, but it’s all about finding what suits you!
Volume and curls: If you’ve got curly or voluminous hair, try creating a little space by flipping the brim to give your hair room to breathe. Berets can be worn with low ponytails, if your hair is longer.
Sophie’s Top Tip: If you have a square or round face (like me!) you can avoid the “Mushroom”* look by always keeping some of your hair visible around your face.
Wearing the beret lower down on the forehead, can shorten the length of your face.
To find out more about face shapes, check out my other advice blog here.
*If you aren’t sure what the “Mushroom” look is, think Victoria Wood and her infamous yellow beret!
Now that you have an idea of how to style your beret, let’s make sure it stays in tip top condition:
Hand wash carefully: If your beret becomes a bit baggy after lots of wear, gently hand wash it. Use cool water and wool-friendly detergent, scrunching the fabric gently (there is a demonstration in this video). Avoid harsh spinning cycles or tumble drying.
Dry flat: After washing, reshape your beret and lay it flat to dry. You can wrap it in a towel to remove excess moisture but avoid hanging it up, as that might stretch it.
Storage: Store your berets flat, or roll them gently if you’re short on space. Be careful with any embellishments by storing them on the inside to avoid snagging.
Rainproof? Sort of!: Wool berets have a natural element of waterproofing. They can handle light rain without absorbing too much water, but in a heavy downpour, it’s best to let them dry naturally afterward.
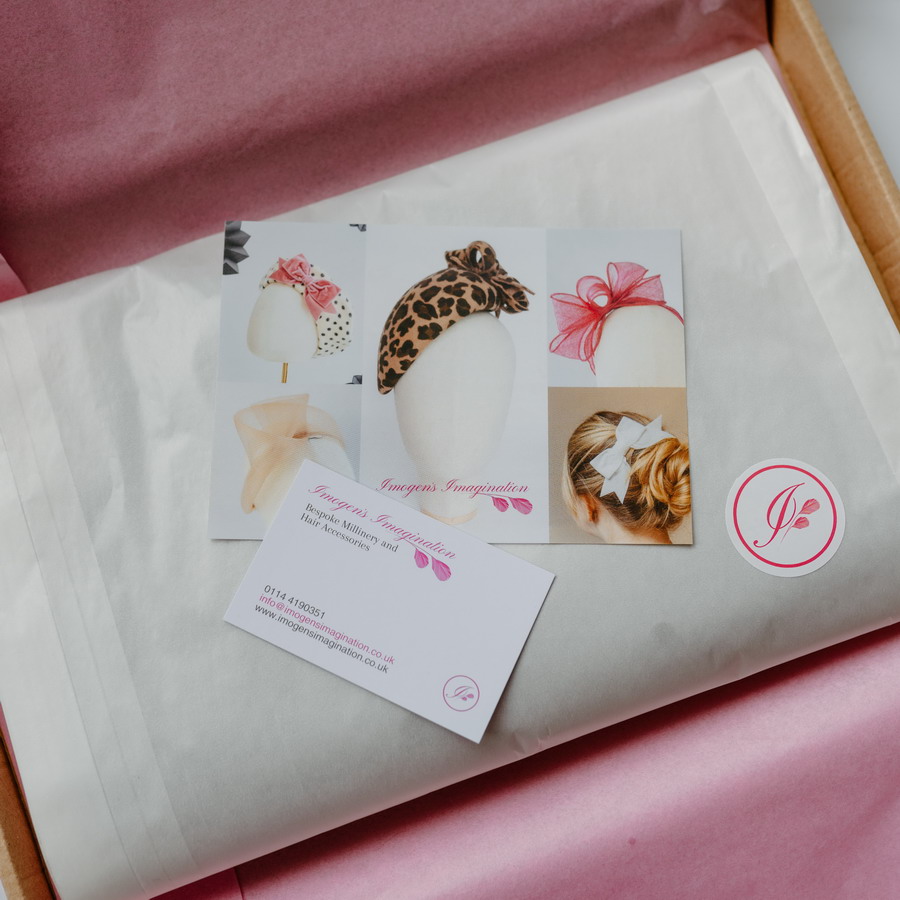
Sophie’s Top Tip: Your beret will be sent in a glassine paper bag.
If needed, this resealable bag can be used for storage – think of it as a dust bag for your beret!
(Alternatively, you can just pop it in your recycling bin!)
At the end of the day, wearing a beret is all about having fun. Play around in front of the mirror, try different looks, and find the style that makes you feel fabulous. Berets are versatile and can be worn casually or dressed up, so experiment with different angles, hairstyles, and outfits until you find the perfect balance.
Berets are a fantastic way to express your personality. Whether you’re looking to stay cosy in the colder months or just add a touch of Parisian chic to your outfit, there’s no wrong way to wear one.
If you’re inspired, you can see the full collection of berets on my website. I’m sure you will find one to suit every mood (and outfit).
I hope you’ve enjoyed finding out how to wear, style, and care for your beret.
Happy beret wearing!

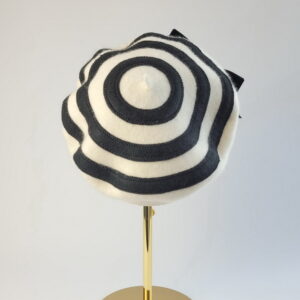
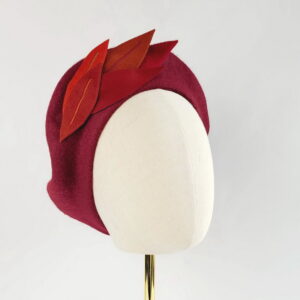
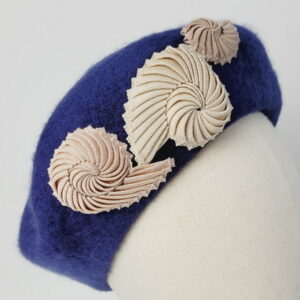
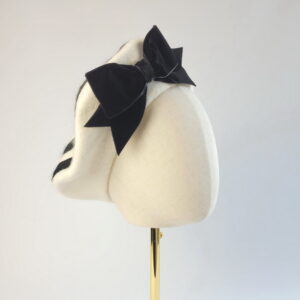
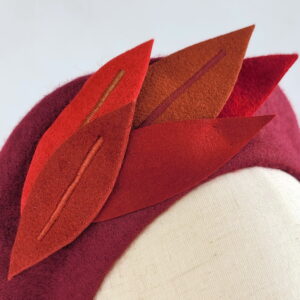
Did you know that I also make custom order berets?
If you would like a different colour combination, or perhaps a totally different style of decoration – just get in touch!
Here’s a few examples from my archive.


Please do stay in touch! Subscribers to my newsletter emails get all the hot off the press news and gossip, as well as advance notice of new collections and exclusive special offers.
If you’ve enjoyed reading this blog, you can find more of my helpful tips to find the right hat for you below.


Here at Imogen’s Imagination, I will be donating over 200 hair accessories to The Little Princess Trust – a charity that provides free real hair wigs to children and young people who have lost their hair due to cancer treatment or other conditions.
The items I’m donating have been discontinued and sitting on my shelves for years. Many of them can’t be repurposed and I can’t just put them in the bin… so I wanted to give them away to an appropriate cause.

I reached out to The Little Princess Trust because their goals align with my business and my products – there’s no denying that I sell girl products! And my ethos has always been that I want people to look and feel great when they wear my designs… and this is exactly what the charity does with their wigs, too.
If you’re not familiar with me or my journey with Imogen’s Imagination, let’s rewind a bit…
Imogen’s Imagination was born from a love of dressing up! Back in the 2000s, I frequented a local burlesque night with my friends, where the whole audience would come dressed to the nines—headwear always being the perfect finishing touch. I’ve always loved sewing, a skill I learned from my mum and grandma, so I started making mini top hats for myself and my friends.
These little creations were a hit, and before I knew it, I was stocking a local boutique, and Imogen’s Imagination was born! When I was thinking up names for the business, “Imogen” immediately came to mind, because of one senior at my dance school named Imogen. She had dreads, so not your typical ballet dancer, and in my 12-year-old eyes, she just oozed cool!
Adult me has never met a nasty Imogen and I liked the alliteration, so Imogen’s Imagination was born! “Imogen” has since morphed into my ballsy alter ego for doing stuff that scaredy-cat Sophie isn’t quite up for!
As the years went by, I’ve been lucky enough to create a variety of hats and hair accessories, from classic elegance to everyday pieces. It’s something I love doing every single day.
But for me, it’s not all about fashion. In 2007, I lost my beautiful, glorious friend Kerry to a brain tumour. She was my best mate from school, and the scrapes we got into were legendary. Kez was an incredible person: fiercely loyal, strong, and determined.
When Kerry was diagnosed with a brain tumour, she fought with everything she had, in true Kez style. Losing her hair during chemotherapy, had a profound effect on Kerry’s confidence and self-esteem at the time. It was something completely beyond her control – and if you knew Kez, you’d know why THAT was a particular problem! (This is a trait that we shared – so I totally got this!)
When Kerry got her first wig, everything changed. The “old” Kez was back and she was so excited to have red hair for the first time! It was a great quality wig, made with real hair, and I remember being amazed at how realistic it was.
Swapping between wigs also meant that Kerry could be ‘herself’ on her wedding day. The wig Kerry chose for this most special day was almost identical to her natural hair colour and original hairstyle, pre-treatment. Wearing her new hair long and loose, as she always did on a night out, Kerry was a beautiful bride.

Ultimately, on 4th March 2007, we lost Kerry – and I still miss her every day. There’s a part of “Imogen” that will always aspire to be more like Kez—fierce, driven, loving hard, while remaining tender. I often ask myself, “What would Kez do?” because I know she would always have had the guts to seize the day and push herself beyond what anyone thought possible.
Every year in March, Brain Tumour Awareness Month, I honour Kez’s memory by taking part in Wear A Hat Day to raise money, awareness, and bring hope to those affected by brain tumours.
The Little Princess Trust ties in nicely with my mission to honour Kerry, as they provide free real hair wigs to children and young people up to the age of 24 who have lost their hair through cancer treatment or other medical conditions.

The Trust works closely with accredited wig fitters, ensuring that recipients never have to travel far for a fitting. They understand that these children and young people are already facing so many challenges, so they make the process of requesting a wig as easy as possible and – most importantly – entirely for free.
Their work doesn’t stop at wigs. The Little Princess Trust has been funding vital research into paediatric cancers since 2016. They’ve provided grants totalling £30 million to 134 research projects to date, all working towards developing less aggressive, less toxic treatments for childhood cancers.
Their vision is clear: to give Hair and Hope to every young person facing cancer, until the day there is no longer a need for their services.
The hair accessories I’ll be donating – bow clips and headbands – are discontinued stock that has been sitting on my shelves for years. While they may no longer be part of my active collections, they’re still beautiful and deserve to be worn. Rather than let them go to waste, I wanted to ensure they went to an appropriate cause.

We’ve all had the pain of a “bad hair day” – but the thought of a “no hair day” is unimaginable to me. It’s called “a crowning glory” for a reason and hair is such an intrinsic part of our own identity and personality. It has such a huge impact on our perception of our self-worth and confidence, regardless of age or levels of emotional resilience.
The Little Princess Trust sends out thousands of wigs annually, helping young people regain their confidence during a difficult time. As these hair accessories all work well with wigs, I thought it would be the perfect pairing… I love the idea that my accessories, which are designed to make people look and feel fabulous, can bring a little extra joy and excitement to those receiving wigs.
As part of this effort, I’m also raising £200 to cover the costs of additional materials, packaging, and postage to ensure the full donation of items reaches The Little Princess Trust effortlessly. I’ll be donating my time to complete part-made stock, but I need some help to cover the rest.

To make it easy for anyone who’d like to contribute, I’ve set up a donation link on my website – tiered at £2.50, £5, and £10 – to help raise the necessary funds.
Or if you’re buying a hat, fascinator or hair accessory from my shop, you can add an optional £2.50 donation with your purchase.
I will also cover any transaction fees charged by my payment providers, meaning your full donation amount will make its way to The Little Princess Trust. Every little bit helps, and any funds raised beyond the required amount will be donated directly to the charity to help them with distribution costs.
Your generosity will allow me to cover these costs while ensuring the accessories are sent seamlessly!
Thank you to everyone who has supported Imogen’s Imagination over the years. With your help, we can bring a little more sparkle into the lives of these amazing young people.

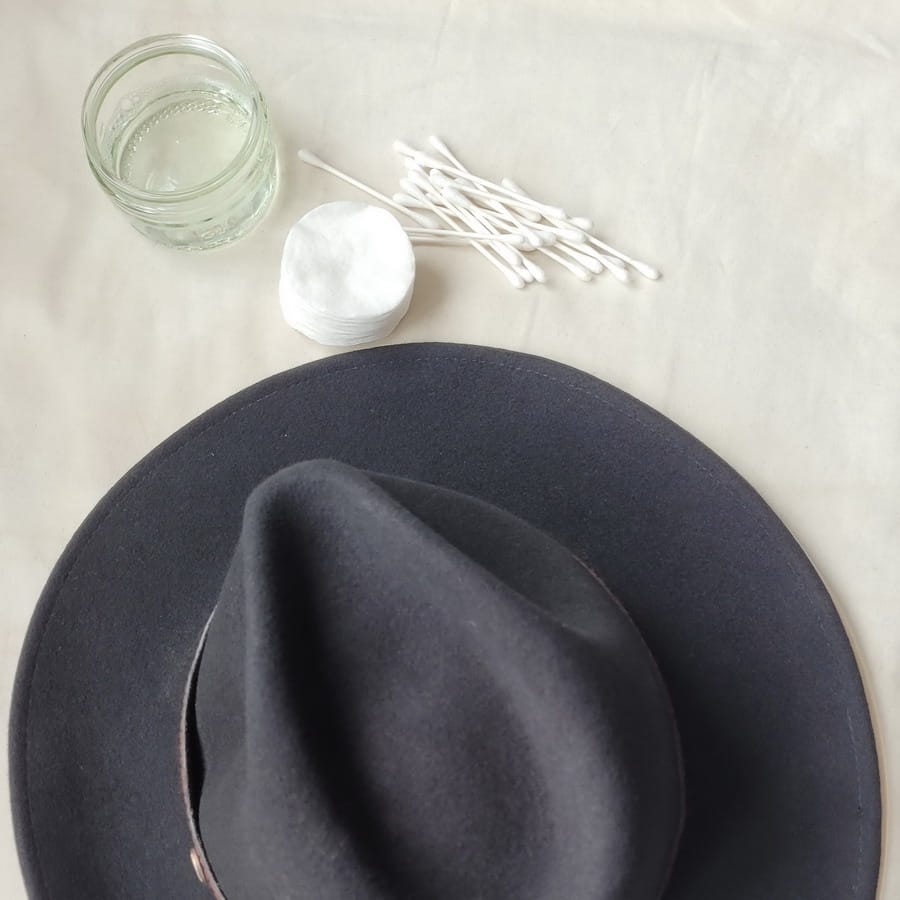
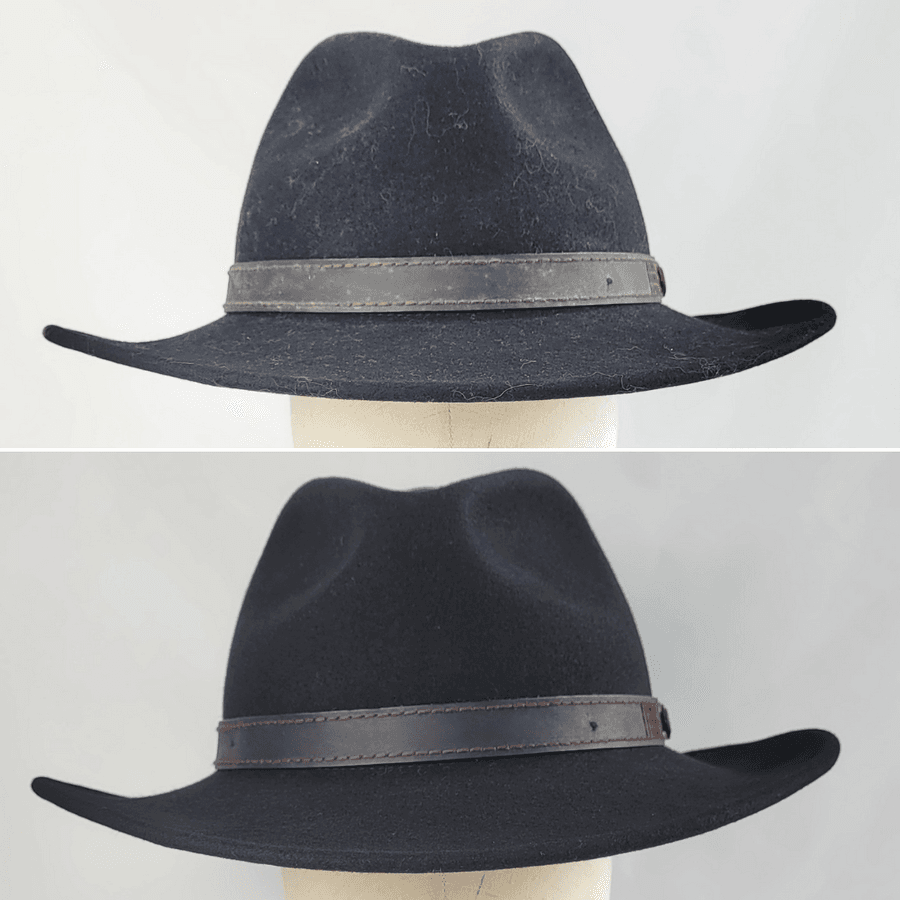
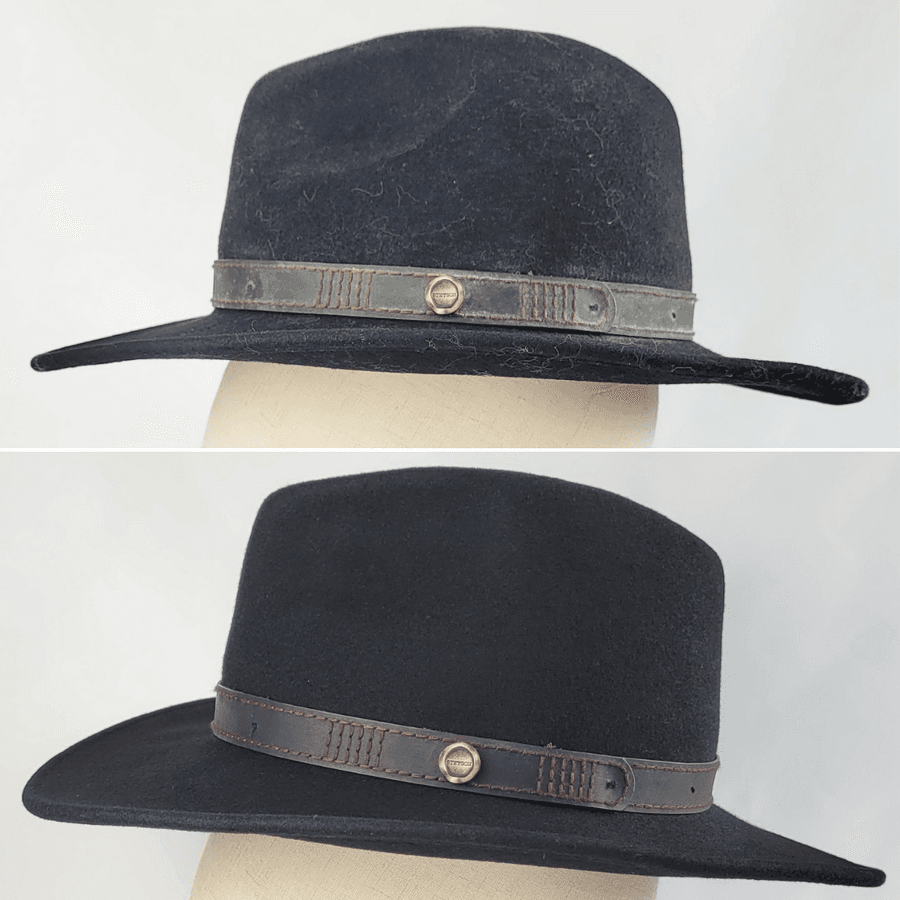
Have you ever wondered how to clean a felt hat? If you’ve ever been too nervous to tackle this task yourself, then I hope this blog will help show you how simple it can be.
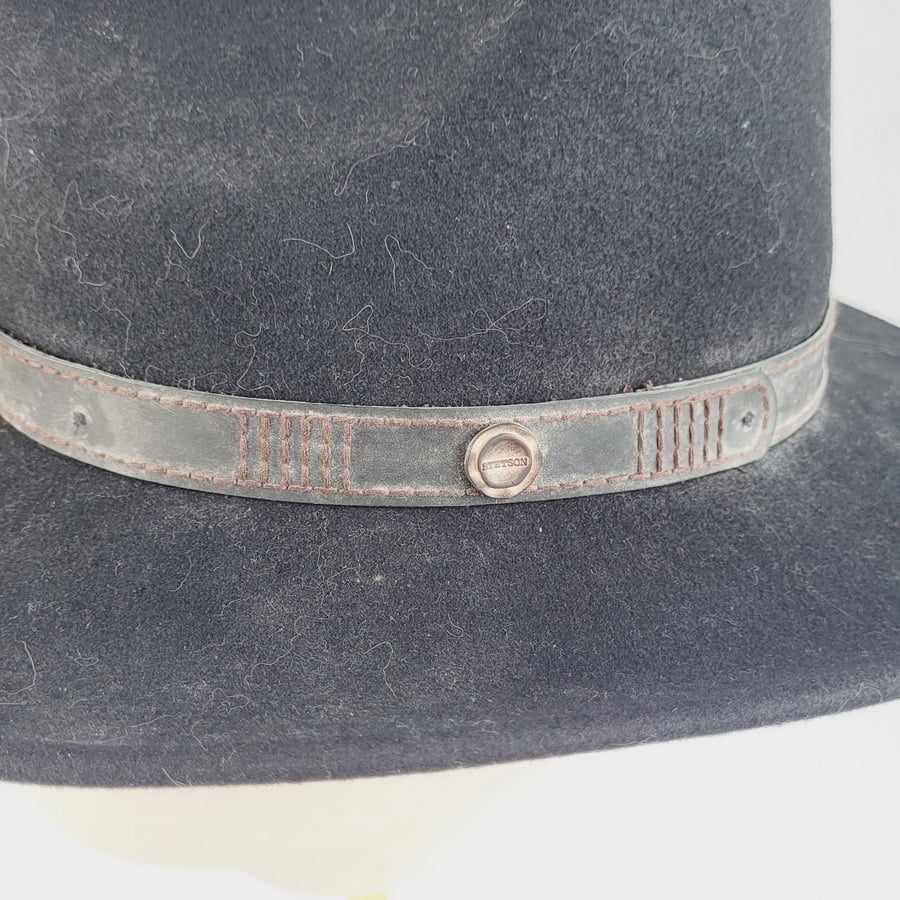
A recent customer brought this fabulous wool felt Stetson hat to me for a bit of TLC.
Sadly, it had been stored on top of a wardrobe for a number of years. Naturally, it had become a magnet for dust and cat hairs!
This hat was in great nick, aside from needing a really good clean. Knowing there were no structural issues, I was confident I could restore this hat to it’s original state.
So if you’ve ever wondered how to clean a felt hat, keep reading for all my insider tips!

First off, I collected together my brushes and cleaning equipment. Then I inspected the hat a little more closely.
I have 3 brushes that I use for cleaning:
I immediately realised that my wire brush would be far too harsh – I didn’t want to damage the felt.
(That went straight back into my brush box!)
This was a three stage process, requiring a few different approaches.
I needed to prevent the dust and cat fur floating around my studio and getting into other work in progress baskets.
The top layer of dirt also had to be removed so that I could see what was underneath! I had spotted some marks, but until the first layer of grime was removed, I wouldn’t know what had caused these… or how to deal with them!
Finally, I needed to choose a safe cleaning solution for the hatband. There were heavy accumulations of dust sitting in the stitching – this needed to be removed early in the process.

I started by using packing tape to remove the very top layer of dust and cat fur.
This may be a little controversial – however it was the best tool for the job!
The tape prevents the dust and fur flying into the air or over my desk protector.
If I’d gone straight in with a brush, it would have floated and settled all over the studio.
Sophie’s Tip: You could use regular sticky tape for this step. However as packing tape is wide, it has a greater surface area… so I used less of of it!

There was no point brushing the felt further until the hat band was properly cleaned up.
I used my nylon suede brush to gently sweep away the dust deposits from the stitching.
You can see the immediate difference this made to the left of this photo. Sadly, you can also see how that dust settled onto the brim of the hat on the right of the photo!
Again, I used tape to collect up the worst of it.
Now the top layer of dirt had been removed, I could start the wet cleaning of the hat band.
If I had got this thick layer of dust wet, it would have essentially turned to slime before drying into solid, hard chunks… these would be impossible to brush out.
(Imagine mopping a mucky floor without sweeping or hoovering first!)
The hat band on this design is made from a PU coated fabric, sometimes called “pleather”.
Which is great news when it comes to wet cleaning!
I just needed a small amount of water with a couple of drops of washing up liquid.
A mild detergent was required, but using anything solvent based would damage the pleather and potentially the hat too.
Sophie’s Tip: If the hat band had been made of real leather, I would still have used this cleaning method. However, I would have been especially cautious not to get the leather too wet.
It was important not to get the water (or detergent!) on the actual hat, so I needed to work small.
First I soaked a cotton wool pad in the water and squeezed out all the excess.
Then I wiped a small area of the hat band, taking care to only make contact with the hat band.

I then used the other, clean, side of the damp cotton wool pad to repeat the cleaning over the same area.
Finally, I used a clean, dry, cotton wool pad to remove any moisture from area I had cleaned.
I continued this 3 step process, working in small sections, around the hatband.
I used different surfaces so that I could lift as much dirt as possible, without compromising the dye in the pleather.

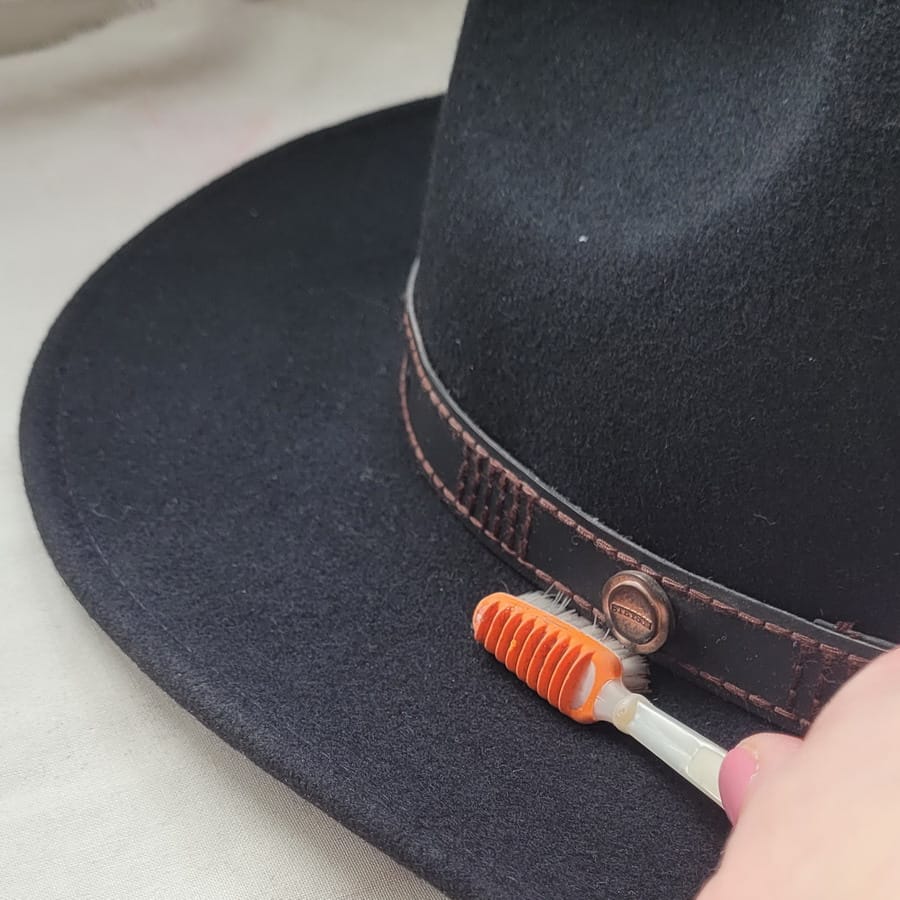
The cotton bud was used to get into the tricky areas of vertical stitching and around the edges of the Stetson stud.
You can see what a difference this gentle cleaning made in this progress pic.
The area to the left of the Stetson stud had been fully cleaned, the right side was still waiting for a bit of attention.
(Can’t lie, I totally felt like one of conservationists cleaning up old oil painting with giant cotton buds… it was incredibly satisfying!)
With my work desk cleared of potential spill hazards (and mucky cotton wool!), it was time to start cleaning the rest of the hat!
First I did a gentle brush with my nylon suede brush, using short light strokes.
Starting at the top of the crown, I worked down the sides, then from the crown to the edge of the brim.
The goal was to loosen any dust that had settled into the top fibres of the felt, without damaging the nap of the felt.
I mentioned the dust that had fallen from the hat band before the wet cleaning.
I used an old (clean!) toothbrush to get into the gap between the hat band and the felt for this job.
Again, I used short light sweeps, to release this dust from the surface of the felt.
First, I went all around the top of the hat band on the crown. Then I worked around the base of the hatband, getting into the groove between the crown and the brim.

Once the deeper cleaning had been done with a slightly stiffer brushes, it was time to go in with my soft clothes brush.
This brush helps to smooth the nap of the felt and remove any dust that has settled as part of the earlier processes.
I started with the underneath of the hat, brushing the inside of the crown first, then working out to the edge of the brim.
Once this brushing had been done, I checked to see if the marks I’d seen earlier were still visible.
Sadly, they were!
There were 3 specific marks that I needed to remove.
I used my nylon suede brush to re-visit these areas of concern.
Using small circular motions, I lightly re-brushed each spot, before brushing the area with my soft brush again.
I repeated this process on each mark until it disappeared.
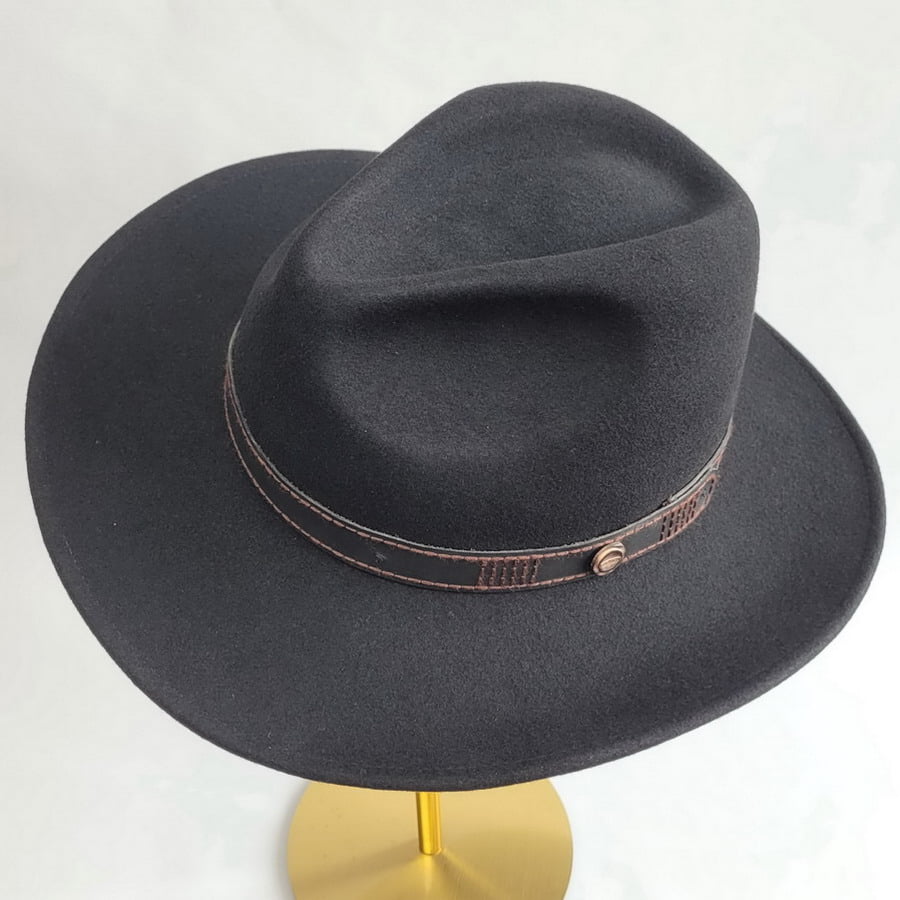
And here is the finished hat!
I think you’ll agree, the results are quite dramatic!
All hats made of felt share the same key enemies:
The simplest way to avoid all of this is to store your hat in a box.
It doesn’t have to be a snazzy or pretty hat box… it just needs to be big enough for the hat to fit into it, without squishing the brim or any decoration.
This customer has been provided with a hat box, complete with acid free tissue paper, to protect and support the hat whilst in storage.
If your felt hat does get a bit dusty though, using a regular clothes brush to give it a quick brush up will stop the dust from getting deeper into the fibres.
When well cared for, felt hats are incredible durable, there’s a reason wool felt has been used extensively in hatting for centuries!
If your felt hat has become a little neglected and you’re nervous about tackling the cleaning yourself, please do get in touch.
I offer a range of hat-related services;
To find out more about how I can help you, check out the links below.
Already know what you want? Or do you simply want to ask a question before booking a consultation? Please do get in touch.
Need some inspiration? Visit my design archive to see examples of hats and fascinators created for bespoke clients and past collections.
Please do stay in touch! Subscribers to my newsletter emails get all the hot off the press news and gossip, as well as advance notice of new collections and exclusive special offers.
If you’ve enjoyed reading this blog, you can find more of my helpful tips to find the right hat or millinery service for you below.
**Shipping to Europe and Northern Ireland is currently unavailable - I am so very sorry for any inconvenience caused** Dismiss